English
 Arabic
 French
 Spanish
 Portuguese
 Deutsch
 Turkish
 Dutch
Dutch
 Italiano
 Russian
 Romaian
 Portuguese (Brazil)
 Greek
Greek
Wart Removal Treatments for Improved Skin Texture
Health |
2026-06-03 05:21:19
 Advertise With Us
 About Us
 Terms And Conditions
 Privacy Policy
TOON ALLES
Privacy Policy
TOON ALLES

Upgrade to Pro
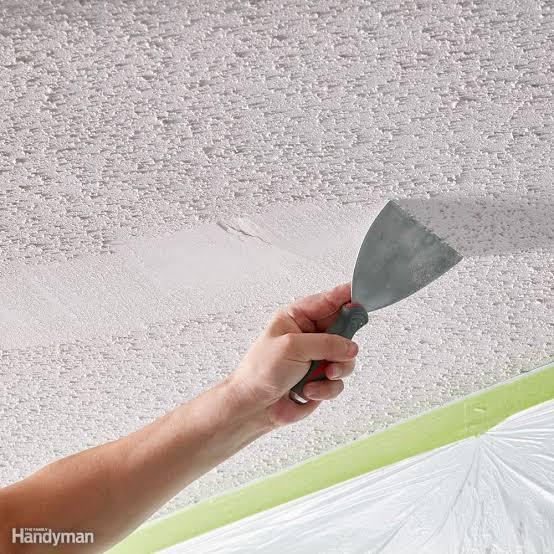
Textured ceilings were once a popular design choice, but many homeowners across the Greater Toronto Area now see them as outdated or difficult to maintain. Older textured finishes can trap dust, make rooms feel darker, and complicate repairs or renovations. If you're planning to update your home's interior, the ceiling is often one of the first places worth considering.
In Ontario, many homes built several decades ago still feature textured ceilings. Renovations, lighting upgrades, and modern interior designs have encouraged more homeowners to replace these finishes with smooth ceilings. Before starting the project, it's helpful to understand what the work involves, how much it may cost, and whether it's a job you should tackle yourself or leave to experienced professionals.
There are many reasons homeowners choose stucco removal as part of a renovation project. While appearance is usually the biggest motivation, there are several practical benefits as well.
Smooth ceilings have become the preferred style in many renovated homes throughout Ontario. They reflect more light, create cleaner lines, and work well with both traditional and contemporary interiors.
Removing an old textured finish can instantly make a room feel:
Brighter
Larger
Cleaner
More up to date
This improvement often complements fresh paint, new flooring, and updated lighting.
Textured ceilings collect dust and cobwebs much more easily than smooth surfaces. Cleaning them can be frustrating because rough textures trap dirt in small crevices.
A smooth ceiling is much easier to:
Dust
Paint
Repair
Clean after renovations
For busy homeowners, reduced maintenance is a major advantage.
If you're installing:
Pot lights
Ceiling fans
New electrical wiring
Crown moulding
a smooth ceiling generally makes installation simpler and produces a cleaner finished appearance.
While textured ceilings rarely reduce property value on their own, many buyers appreciate updated finishes. During renovations, replacing older ceiling textures can help create a more consistent look throughout the home.
Many houses built between the 1960s and the 1990s used textured ceiling finishes because they were quick to install and helped hide minor imperfections in drywall.
Several factors contributed to their popularity.
Builders could apply texture without spending extra time achieving perfectly smooth drywall joints.
Small cracks, nail pops, and uneven drywall seams were less noticeable beneath heavy texture.
Although not soundproof, textured finishes slightly reduced sound reflection inside larger rooms.
Today, many Ontario homes have ceilings that have experienced decades of settling, repainting, humidity changes, and minor repairs. During renovations, homeowners often choose remove stucco ceiling projects to create a fresh starting point before updating the rest of the space.
Many homeowners underestimate how much preparation is involved before the actual ceiling work begins. A careful process protects your home while producing a smooth, long-lasting finish.
Every project should begin with a close inspection of the existing ceiling.
Contractors typically check for:
Water damage
Cracks
Previous repairs
Loose drywall
Signs of mould
Older ceiling materials that may require additional testing
Homes built before the late 1980s may require testing before work begins because some older textured finishes can contain hazardous materials. This step should never be skipped when there is uncertainty.
Preparation often takes almost as much time as the removal itself.
Furniture is either removed or carefully covered.
Floors receive protective coverings.
Doorways and HVAC vents are sealed to reduce dust travelling through the house.
Light fixtures, smoke detectors, and ceiling fans may also be removed temporarily.
The exact technique depends on how the original ceiling was installed.
Some textured finishes soften with water and can be scraped away carefully.
Others have been painted several times over the years, making them much harder to remove. In these situations, contractors may use sanding equipment or skim coating techniques to achieve a smooth finish.
Many homeowners researching stucco ceiling removal are surprised to learn that no single method works for every home.
Once the texture is gone, imperfections often become visible.
The ceiling may need:
Drywall repairs
Joint compound
Crack filling
Sanding
Spot priming
This stage has a major impact on the final appearance.
Several thin coats of finishing compound are often applied before sanding the ceiling smooth.
Professional lighting is sometimes used to identify small imperfections that would otherwise become noticeable after painting.
A quality finish depends on patience more than speed.
After the surface is completely dry and smooth, the ceiling is primed before receiving one or two coats of ceiling paint.
Using a quality primer helps ensure consistent colour and improves paint adhesion, especially after extensive repairs
One of the first questions homeowners ask is how much the project will cost. The answer depends on several factors, including the condition of the ceiling, the size of the space, and the amount of finishing work required after the texture is removed.
Rather than focusing on a fixed price, it is more helpful to understand what influences the overall investment.
For many homes in the Greater Toronto Area, homeowners can generally expect:
A single room: several hundred to over a thousand dollars, depending on size and condition.
Multiple rooms: costs increase with square footage but may offer better value per room.
Whole-home projects: pricing is usually based on total ceiling area, accessibility, and finishing requirements.
If asbestos testing or remediation is required, that will add to the total cost and should always be completed before work begins.
No two homes are exactly alike. Contractors typically consider several variables before preparing an estimate.
Larger ceilings naturally require more labour, materials, and cleanup time.
Standard eight-foot ceilings are generally easier to work on than vaulted or cathedral ceilings, which require additional equipment and safety precautions.
A ceiling with water stains, cracks, sagging drywall, or previous patchwork often needs additional repairs before it can be finished smoothly.
A heavily painted textured ceiling is usually more difficult to remove than an unpainted one. Multiple layers of paint can make scraping ineffective, requiring alternative methods that increase labour.
Empty rooms are faster to prepare than spaces filled with furniture or delicate fixtures.
Some homeowners simply want the texture removed, while others expect a perfectly smooth, paint-ready finish that blends seamlessly with adjacent rooms. Higher finishing standards generally require additional skim coating and sanding.
Choosing the right contractor is just as important as deciding to update the ceiling. Taking a little extra time during the planning stage can help you avoid unnecessary stress and unexpected costs.
Every contractor has a different approach. Ask them to explain:
How they protect your home from dust
Whether they perform repairs after removing the texture
What type of finish you can expect
Whether painting is included
Clear answers usually indicate experience and good project planning.
A written quote should outline what is included, such as:
Surface preparation
Ceiling removal
Drywall repairs
Priming
Painting
Cleanup
Disposal of debris
This makes it much easier to compare multiple estimates fairly.
Most projects take anywhere from a day to several days depending on the size of the home and the amount of finishing work required.
Drying time between coats of compound and paint may extend the overall schedule, especially during humid Ontario weather.
Ask to see photos of completed ceilings or recent renovation projects. A smooth ceiling shows even the smallest imperfections, so quality workmanship matters.
For example, experienced companies such as revivepainting often document completed projects to help homeowners understand the difference between an average finish and a professionally completed one.
Ask what warranty applies to workmanship and whether any conditions could affect future coverage.
Knowing this in advance provides additional peace of mind if minor adjustments become necessary after the project is complete.
Some ceilings simply look outdated, while others may indicate underlying problems that deserve immediate attention.
Addressing these issues early can prevent larger repairs later.
Small hairline cracks can occur naturally as homes settle. However, widening cracks or recurring repairs may indicate movement that should be evaluated.
Brown or yellow stains often point to previous or active leaks.
Before refinishing the ceiling, the source of moisture should always be repaired.
Sections that begin separating from the drywall may continue falling over time.
Loose texture can also make future repairs more complicated.
A ceiling should never appear uneven or bowed.
Sagging may result from water damage, weakened drywall, or structural concerns that require professional inspection.
Bathrooms, kitchens, and basements are particularly vulnerable to excess humidity.
If mould appears on a textured ceiling, simply painting over it is rarely a permanent solution. Moisture issues should be resolved before any refinishing work begins.
Many homeowners enjoy tackling renovation projects themselves, especially when trying to save money. While there are some home improvements that are well suited to DIY, removing an older textured ceiling can quickly become more challenging than expected.
Before deciding which route to take, consider the advantages and limitations of both options.
A do-it-yourself approach may be reasonable if:
The ceiling is in a small room.
The textured finish has not been painted multiple times.
The home is newer and there are no concerns about hazardous materials.
You already have experience repairing drywall and finishing surfaces.
You have the time and patience to complete the work carefully.
Homeowners researching how to remove stucco from ceiling often discover that preparation and finishing require far more time than the actual scraping process.
Even straightforward projects can become difficult because ceiling work is physically demanding.
Common DIY challenges include:
Working overhead for long periods
Creating excessive dust throughout the home
Damaging the drywall during removal
Achieving a smooth, even finish
Managing cleanup and debris disposal
Minor mistakes are often very noticeable once the ceiling is painted, especially in rooms with large windows or recessed lighting.
Experienced contractors bring specialized tools, efficient preparation methods, and finishing techniques that are difficult to replicate without experience.
Professional services often provide:
Better dust containment
Faster project completion
Consistent drywall repairs
Smooth finishing with fewer visible imperfections
Proper handling of unexpected issues
For larger homes or ceilings in poor condition, hiring an experienced team is often the more practical and cost-effective decision.
Ask yourself a few simple questions before starting:
Is the ceiling painted or unpainted?
Does the room have high or vaulted ceilings?
Are there signs of water damage or cracking?
Can you safely work overhead for several hours?
Do you have drywall finishing experience?
If the answer to several of these questions is "no," professional help is likely the safer choice.
Updating an older textured ceiling is one of those improvements that can dramatically change the feel of a home without altering its layout. A smooth finish reflects more light, complements modern interiors, and makes future maintenance much easier. Understanding the process, expected costs, potential warning signs, and the differences between DIY and professional work allows homeowners to make informed decisions before starting a renovation remove stucco ceiling